This is a tool to categorize your expenses as recorded by your bank. First you download the data from the bank in CSV format. Import it here and assign categories to each entry. This tool allows you to do all that without storing your data on any server - it’s stored in your browser local storage and not transmitted over the network. So nobody can see your money business. Then you categorise expenses manually or also by defining automatic rules. In the end you will see how much is spent on each category in every month. This information is shown in a table as well as a pie chart.
This is like Numbrs but without providing your bank account password to anybody.
Introduction
I suppose you have a bank account. Most likely you also have an online banking access and can see your purchases and incomes in a long list. What you likely don’t know is how much do you spend in total by categories. Not because you are not interested, but because it seems complicated and time consuming.
I was in your shoes. Below I present my own solution to this.
Quick Start
Below are steps you need to do in order to start working with Umsaetze. Steps 1 and 2 (exporting and importing) are only needed to be performed once (maybe repeated once a few months).
Step 1. Exporting.
Login to your online banking and download all your transactions into CSV file. Make sure to download as much data as possible. Your bank may only show the transactions from the latest few months. Use filters to select all of the available data.
Every bank stores data in the CSV file in their own way. Often there are multiple header lines, footers. The amount of columns, their order and the content subdivision varies a lot. Umsaetze employs a heuristic CSV parser which is able to extract the information from most CSV files. The important information is:
- Date
- Money amount
All other fields are combined into a single “note” field.
We are working on supporting MT940 files which are used by some banks. It’s not supported yet.
PDF exports are not supported and will not be.
Step 2. Importing.
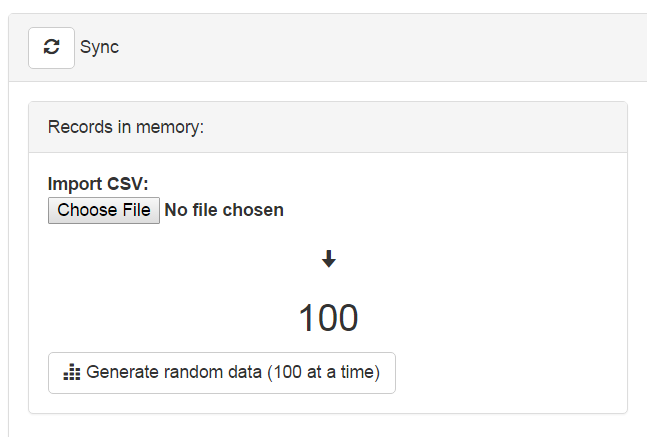
Go to Umsaetze. You don’t need to login to the system. Once the application is loaded it will not connect to the Internet and the data in the application will never be transferred anywhere. They remain on your computer - make sure you use your own computer or delete local storage afterwards.
The first page is currently empty. We need to switch to Sync menu to start importing. Import your CSV file by selecting it from your computer. Depending on the file size it may take some seconds. The view will switch to the Dashboard.
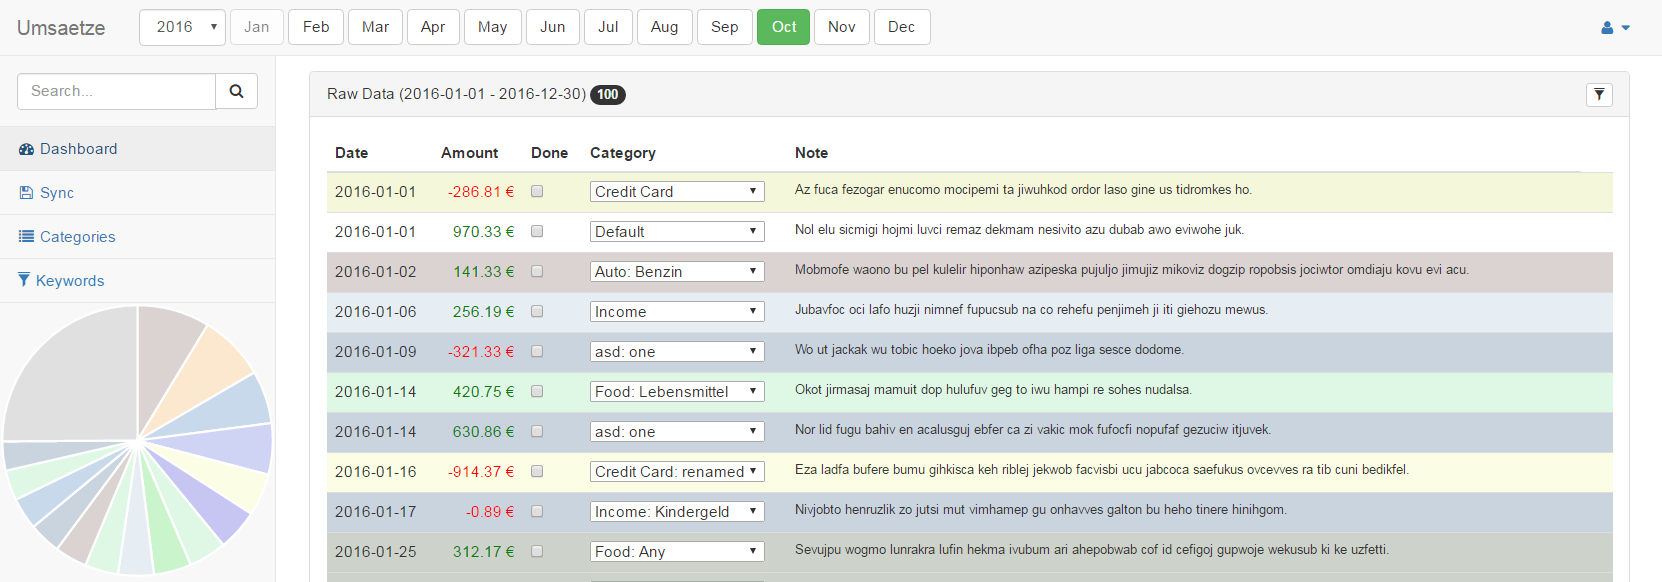
Step 3. Plain view of transactions.
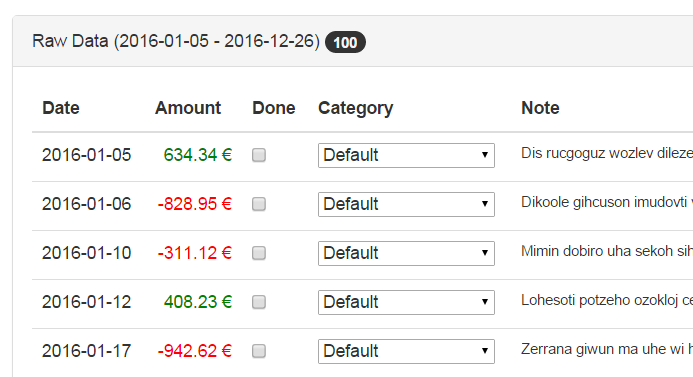
You are back to the Dashboard page where it shows your expenses just like they are shown in your online banking. One difference is that only transactions from a selected month are shown. You can switch year and month on the top of the page.
Step 4. Specifying categories.

The main reason we imported the data is because we will categorize them. Switch to Categories menu and enter some categories. We don’t provide a fixed list of categories as different people will have different types of expenses and want to categorize them differently. These could be:
- Income: Salary
- Income: Other
- Food: Grocery
- Food: Restaurant
- Food: Other
- Technical
- House: Bank
- House: Necessities
- House: Repairs
- Transportation
- Car: Fuel
- Car: Repairs
- Entertainment
- Others
Notice that some of the categories above are sub-categorized with a colon character “:”. You are not required to do that, but if you do - the summary page (described below) will be able to give you the totals for super-categories as well.
Step 5. Categorizing and getting results.
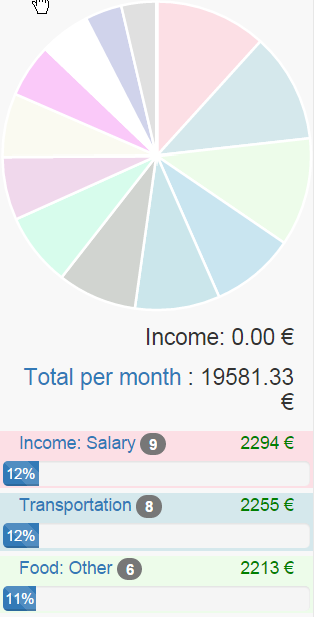
Switch back to Dashboard and try selecting the corresponding category for some transactions. Notice that every line is colored according to the category. Also notice that the sidebar on the left starts filling with the summarized totals for every category. A pie chart of the categories is shown as well.
Categorization can be automated. You may select a word or a phrase in the note (comment) column and associate this keyword with a category from a drop-down. This will set the selected category for all transactions where this keyword occurs. In all months. And the associations will be remembered and can applied next time you import a CSV file again. See filter-button on top of the transaction list.
Step 6. Summary page.
A lot of useful insights can be drawn from category totals. But they can be viewed for a selected month only. You can switch months and compare values like that.
There’s a better way for comparing category-totals between the months. In the top drop-down menu you can switch to Summary page. It shows you a complete overview of your expenses per month and per category.
If you have defined categories with super-categories like this “Food: Other”, “Food: Restaurant”, the Summary page will also summarize the totals for super-categories.
ToDo
You will be able to select words and associate them with a category. This will allow automatic categorization.Pie chart for categories in a sidebar.See single category details with charts showing how much you spent on it per month.- Import MT940 files.
- Separate Summary page into years.
- Your ideas?